Converting a number of files
at one time
Starting Hp2Design Pro
- Open Start | Programs | Hp2Design Pro.
If this is your first use of Hp2Design Pro, a dialog box appears as shown here.
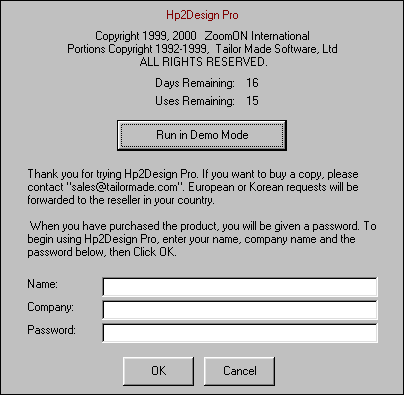
- If you want to make use of the free trial period, click Run in Demo Mode to proceed.
|
NOTE:
|
If you want to extend your trial use of Flat Out, you can do so for 21 days (or 21 separate sessions). Every time you start Flat Out, this dialog box will appear, necessitating your clicking the Run in Demo Mode button until you (1) reach the end of the trial-use period or (2) purchase a license for Flat Out! use and register yourself in this dialog box.
|
- If you are registering as a licensed user of Hp2Design Pro, fill in the Name, Company and Password fields and click OK to proceed.
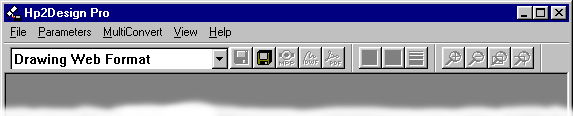
The Hp2Design Pro window appears, as shown here.
 You can now change the conversion parameters for all of the files to be processed at this time, as detailed in the following section.
Customizing the input conversion parameters
- Open the Parameters menu and choose AutoCAD Import. (Or, click the P in button.)
The HPGL Input Parameters dialog box appears, as shown here.
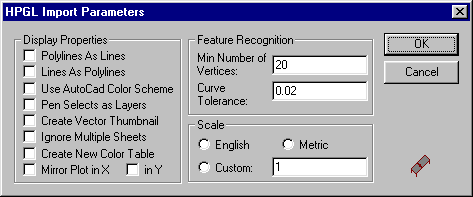
- You can change any of the following dialog box options:
- Click any of the Display Properties checkboxes to activate those options.
- Click in the Feature Recognition/Min Number of Vertices field and type the desired number.
- Click in the Feature Recognition/Curve Tolerance field and type the desired percentage (up to hundredths).
- Click the relevant Scale option button. If you click "Custom", click in the text field to the right and type the desired number.
- Click OK to save your input parameter settings.
Picking and customizing the output file format
Hp2Design Pro enables you to select and customize any of a number of output file formats available for use These formats can be selected and customized by means of the OutPut Parameters menu -- where all the possible output formats are listed under the three main category menus, Internet, Vector and Raster. When you select an output format from this menu, a format-specific parameter dialog box appears, which you can use to fine-tune your output as needed.
- To start, you can pick an output format by opening the menu labeled "Drawing Web Format" and choosing the desired file format from those listed.
- You can now customize the parameters for that output format.
As there are so many formats, and different dialog boxes for each, we've detailed the output parameter dialog boxes and their features on a separate page. To view this page, click Output Formats. When you are finished with that page, you can click any of the Return to previous page links on that page to return to this very section, at which time you can proceed to the next step -- changing the date and time stamp format.
Converting a batch of source files
To convert a folder-ful of source files, follow these steps.
- Click Multiconvert in the Hp2Design Pro window menu bar -- or, click the Multiple Disk button (shown below) in the upper row of tools.
 The Multiple File Conversion dialog box appears, as shown here.
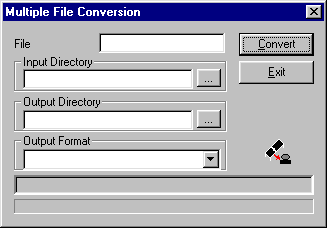
- To pick the directory in which the source images are stored, click the (...) button to the right of the Input Directory text field.
|
ALERT:
|
For information on the use of wildcards in the Input Directory field, click "Wildcards".
|
The Change Directory dialog box appears, as shown here.

- Use the dialog box's directory navigation features to locate and select the directory storing the source files.
- Click Open to close the dialog box.
- When the dialog box closes, you can pick the target directory in which the resulting output images are to be stored. To do so, click the (...) button to the right of the Output Directory text field.
|
ALERT:
|
For information on the use of wildcards in the Input Directory field, click "Wildcards".
|
The Change Directory dialog box reappears.
- Use the directory navigation features to locate and select the directory where the batch output files are to be stored.
- Click Open.
When the dialog box closes, you can proceed.
- Open the Output Format menu (as shown here) and choose the desired format.
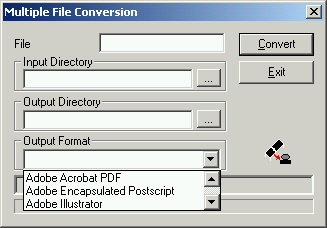 This menu lists Web-ready formats, vector formats and raster formats.
- Click Convert to initiate the conversion process.
The status bar at the bottom of the Flat Out! window will record the process -- and completion -- of this conversion.
EXTRA: Using wildcards to specify files
Using the Multiple File Conversion dialog box Input and Output text fields, you can type DOS wildcards to specify some or all of the files in the current directory or, by typing the full pathway, a file in any other directory.
The standard DOS wildcards can be used to designate a related collection of file names. These include the following:
- Question mark ("?")
- This entry will find file names including any single additional character. Typing "PLOT?.DWG" will allow Hp2Design Pro to find and convert PLOT1.DWG and PLOT2.DWG but not PLOT.DWG.
- Asterisk (*)
- This entry will match any zero or any other combination of characters. Typing "PLOT*.DWG" will allow Hp2Design Pro to convert any file name that starts with PLOT and which contains the .DWG extension. Using the previous example, PLOT*.DWG will find PLOT.DWG as well as PLOT1.DWG and PLOT2.DWG, but will not find PLOT1.DXF -- as it contains the wrong extension.
To convert the output files into a different directory than the input files' source directory, you can use the Output Directory features. The Output Directory field automatically displays the directory of the last Input File defined in Single File operation (if one has been defined). You can manually change this entry to any other valid directory before initiating conversion.
ED: 11.21.00 | Contents © 2000, Tailor Made Software, Ltd.