Converting a single file
Starting Hp2Design Professional
- Open Start | Programs | Hp2Design.
If this is your first use of Hp2Design Professional, a dialog box appears, as shown here.
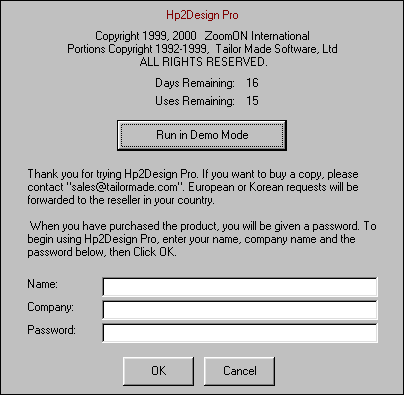
- If you want to take advantage of the free trial period, click Run in Demo Mode to proceed.
|
NOTE:
|
If you want to extend your trial use of Hp2Design Pro, you can do so for 21 days (or 21 separate sessions). Every time you start Hp2Design Pro, this dialog box will appear, necessitating your clicking the Run in Demo Mode button until you (1) reach the end of the trial-use period or (2) purchase a license for Hp2Design Pro use and register yourself in this dialog box.
|
- If you are registering as a licensed user of Hp2Design Pro, fill in the Name, Company and Password fields and click OK to proceed.
The Hp2Design Pro window appears, displaying the set of features shown here.
 NOTE: When the Hp2Design Pro window first appears, the menu bar shows a basic set of commands and tools—many of which are inactive. Both tools and menu options will change radically after you open a source file—as detailed later in this Web page.
You can now open and prepare a source image (input file) for conversion, as detailed in the following sections.
Opening an image in Hp2Design Pro
- Open the File menu and choose Open.
The Open dialog box appears, as shown here.
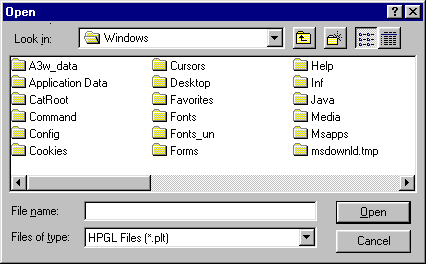
- Use the directory navigation features to search for and find the source file.
NOTE: To see only those files in a particular graphics file format, open the File of Type menu and choose from the following—.HP, .HP2 .HPGL or .PLT. This will allow Hp2Design Pro to list only those drawings in that format when you open a new directory.
- Select the file name and click Open.
The image appears in the Hp2Design Pro window. The menu bar adds new commands while the previously inactive editing, zoom and pan tools are now ready for use.

- You can now do any of the following:
- View the drawing with the help of the zoom and pan tools
- Make changes to key graphics parameters
- Use the "quick conversion" features to immediately convert this image
- Use the Format Parameter dialog boxes to fine-tune the conversion process, after which you can convert your source image
These tasks are described separately in the following sections.
Using the Zoom and Pan tools
to view a source image
After opening a source image (the "input" file) in the Hp2Design Pro window, you can use the following image viewing tools to examine the drawing to any level of detail.
 |
Click the Zoom In button to progressively magnify portions of the drawing. |
 |
Click the Zoom Out button to progressively "zoom out" or to view larger portions of the drawing. |
 |
Click the Zoom Full Page button to instantly view the entire drawing. (This is a zoom-out short cut.) |
 |
To use the Zoom Selection button, do the following:
Click the button, then decide which region of the drawing you'd like to magnify.
Now click the mouse on one corner of this region (using the magnifying glass cursor,) then drag the mouse (while holding the mouse button down) until a zoom rectangle surrounds the desired region.
Click once inside this rectangle. The selected region will fill the Hp2Design Pro window. |
Changing graphic elements
in a source image
You can use the following image editing tools to change certain primary elements in the drawing prior to conversion. Note that these changes do not permanently apply to the original drawing, and are applied to the final output, if conversion is completed.
 |
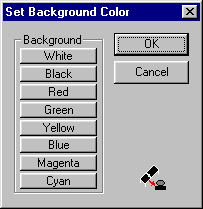
Click this button to open the Set Background Color dialog box (shown below), which you can use to replace the existing background color with another. You can change the background color more than once.
|
|
 |
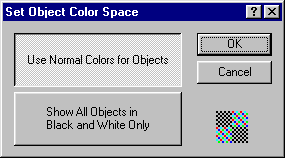
Click this button to open the Set Color Object Space dialog box (shown below), which enables you to reduce a full-color drawing to black and white—or back to full color from black and white if you don't like the effect.
|
|
 |
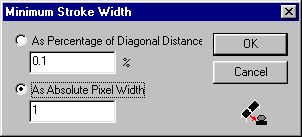
Click this button to open the Minimum Stroke Width dialog box, which allows you to pick from two line weight options—as shown here. |
|
Using the quick conversion options
Normally, you may want to check the input parameters, then open the particular format parameter dialog box for your output file and review the options before starting the actual conversion. This process begins with "Customizing the input conversion parameters".
If, however you want to skip the review of any format-specific parameters and immediately proceed to converting this image, you can do so by doing the following:
- Use the quick format buttons in the Hp2Design Pro toolbar—as shown here:

|
Click the Create MPP button to immediately convert this file to a ZoomOn .MPP-format file—which will be stored in the same directory as the source image.
Click the Create DWF button if you want to immediately convert the source file to an AutoDesk .DWF (Web ready)-format file.
Click the Create PDF button to immediately convert the source file to an Adobe Acrobat .PDF-format file.
|
- Open the Convert Image menu and choose any of the formats from the four category menus—"Internet", "Vector", "Raster" and "Fax Formats".
Hp2Design will immediately convert the source image to the desired format, and store that file in the same directory as the source file.
Customizing the input conversion parameters
- Open the Input Parameters menu and choose HPGL Import.
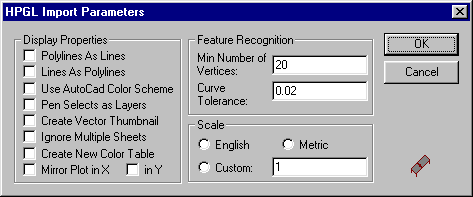
The HPGL Input Parameters dialog box appears, as shown here.
- You can change any of the following dialog box options:
- Click any of the Display Properties checkboxes to activate those options.
- Click in the Feature Recognition/Min Number of Vertices field and type the desired number.
- Click in the Feature Recognition/Curve Tolerance field and type the desired percentage (up to hundredths).
- Click the relevant Scale option button. If you click "Custom", click in the text field to the right and type the desired number.
- Click OK to save your input parameter settings.
Picking and customizing the output file format
Hp2Design Pro enables you to select and customize any of a number of available output file formats. These formats can be selected and customized by means of the Output Parameters menu—in which all of the possible output formats are listed under three category submenus, Internet, Vector and Raster. After you select an output format from this menu, a format-specific parameter dialog box appears, which you can use to fine-tune your output as needed.
- To start, you can pick an output format by opening the menu labeled "Drawing Web Format" and choosing the desired file format from those listed.
You can now customize the parameters for that output format. As there are so many formats, and different dialog boxes for each, we've detailed the output parameter dialog boxes and their features on a separate page.
- To view this page, click Output Formats.
- When you are finished with that page, you can click any of the Return to previous page links on that page to return to this very section, at which time you can proceed to the next step—changing the date and time stamp format.
Starting the conversion
To initiate the actual conversion (once all of the input and output parameters have been customized), you have the following options:
- If your preferred output format is .MPP, .DWF or .PDF, click the appropriate button in the toolbar—shown here.

- If your output format is not included in the toolbar buttons, open the Convert To menu and choose the desired format from one of the four output category menus—Internet, Vector, Raster and Fax Formats.
The status bar at the bottom of the Hp2Design Pro window will record the process—and completion—of this conversion.
- You will find the newly converted output file in the same directory as the source image.
ED: 11.21.00 | Contents © 2000, Tailor Made Software, Ltd.

 NOTE: When the Hp2Design Pro window first appears, the menu bar shows a basic set of commands and tools—many of which are inactive. Both tools and menu options will change radically after you open a source file—as detailed later in this Web page.
You can now open and prepare a source image (input file) for conversion, as detailed in the following sections.


